Rooting My Eight Sleep Pod 3
I've been using an Eight Sleep Pod 3 for a while now, and while I love the autopilot temperature control and sleep tracking features, I've always been frustrated by the cloud dependency. What happens if the internet goes down? What if Eight Sleep's servers have an outage? More importantly, why should my local device need to phone home just to adjust the temperature?
Those questions became painfully real on October 20th, 2025, when AWS us-east-1 went down. I woke up in the middle of the night, teeth chattering, shivering under my covers. My Eight Sleep Pod had plummeted to freezing temperatures, ice-cold, and I couldn't figure out why. In my half-asleep stupor, I fumbled with my phone, trying to adjust the temperature through the app, but nothing was working. That's when it clicked: Eight Sleep's cloud service was down, and my bed was stuck in cooling mode, cranking all the way down to the coldest setting.
I had to unplug the Pod entirely and wait for it to warm back up to room temperature. The irony wasn't lost on me (I work at AWS), and here I was, a victim of our own infrastructure failure. The next morning, I read articles about people whose beds had done the opposite, heating up to maximum temperatures and practically burning people in their sleep. That's when I knew I had to do something. A smart bed shouldn't become a liability when the cloud goes down.
Going Local
To be fair to Eight Sleep, they responded quickly and released a feature enabling Bluetooth controls for their Pods shortly after this outage. They were very aware that the cloud dependency had become a critical failure point, and Bluetooth was their official response - a method to control your Pod locally when the internet goes down. It was a step in the right direction, but it still required their app and didn't give you full control over your own device.
For me, that wasn't enough. I wanted complete independence from their infrastructure, the ability to customize how my Pod works, and the peace of mind that comes with knowing my bed won't turn into a liability when AWS has a bad day. I assumed the Eight Sleep Pod ran Linux, like most embedded devices, and I couldn't resist the urge to see whether I could gain root access. But before I had the chance to explore on my own, my friend Mike Kunz[1] (who had heard my story) came across Free Sleep and sent it my way. Free Sleep is an open-source project created by David Silva that lets you jailbreak your Pod and take full local control.
Tools Required
The Free Sleep repository does a fantastic job of outlining these steps in more detail. First, you need to be sure to have the tools:
- $50 TC2070-IDC - 14 pin Plug-of-Nails programming ribbon cable
- $13 FTDI FT232RL - FTDI USB to TTL Serial Adapter
- $7 Dupont Wires - Breadboard Jumper Cables
If you're a soldering expert, there is an alternative to purchasing the TC2070-IDC by soldering the 3 required wires to the JTAG header instead, but I believed a $50 investment was worth my time to skip this step (and I'm far from an expert).
Opening the Device
Most of the rest of this post will walk through my experience with the Free Sleep's installation instructions. It all starts with cracking open the device, which funnily enough was the most difficult part of the whole process. The "tear down" was documented with pictures, which while helpful, led me to second guess myself multiple times. Despite my dissatisfaction with the cloud dependency, I have come to rely on the Eight Sleep temperature controls to sleep at night, so I wanted to be extremely careful getting the plastic open.
Step 1: Remove the Fan Grill
The first step is removing the fan grill from the Pod - it's attached via plastic clips. Wedging tools on each side I was able to get separation, however, I found that it was difficult to pull out perfectly without one of the four clips catching. I ended up using some dupont cables to help pull it out evenly from the center. This prevents any damage to the fan or surrounding components.

Step 2: Remove the screws attached to the Lid
Pull the fan grill out gently to get space to see the screws attaching the framing to the plastic lid. If space allows, simply remove these screws and move onto Step 3. If you don't have room to remove the screws, gently pull the fan casing to the side and remove the screws that attach this section to the main pod. This will allow easier access to the lid, but is more complicated.
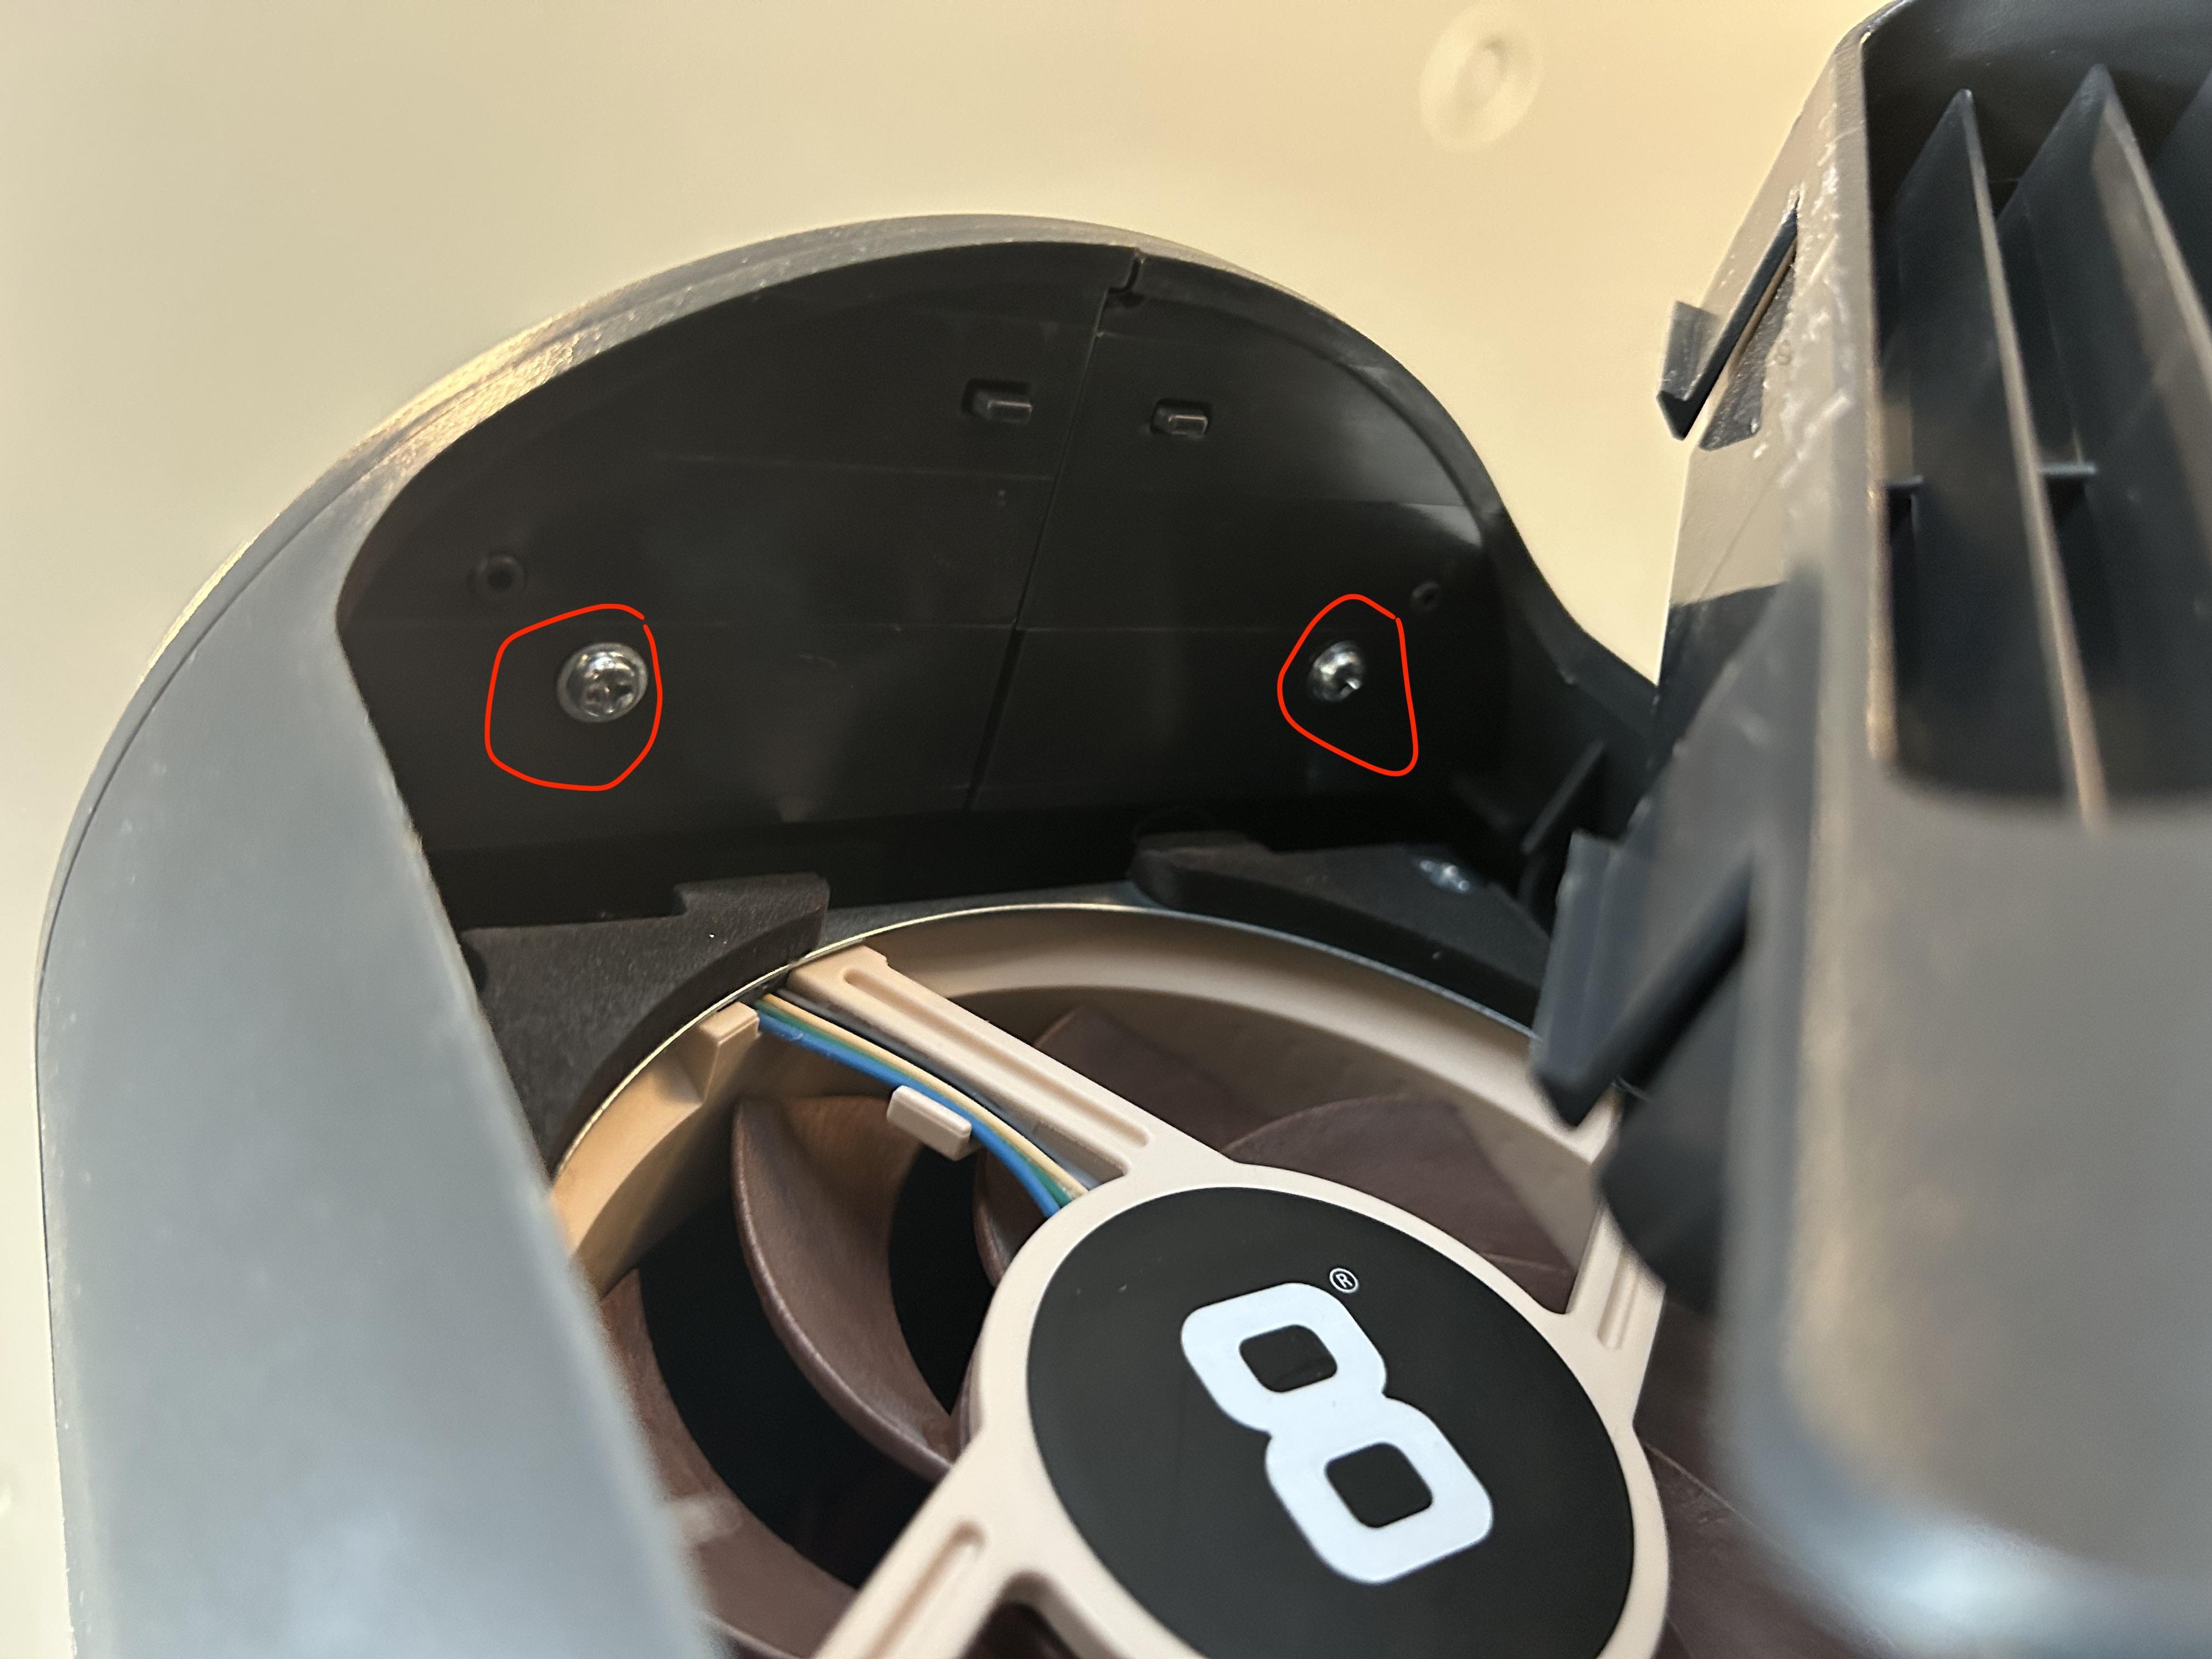
Image credit: Free Sleep documentation
Step 3: Remove the Plastic Lid
Once the fan is out, you need to carefully remove the plastic component on the top that covers the internal board. This requires patience and gentle prying to avoid cracking the plastic housing. I used a lot of tiny screwdrivers and spudgers to help pry it open. Note - removing the hose connection to the Eight Sleep mattress cover made the pod much easier to manipulate.
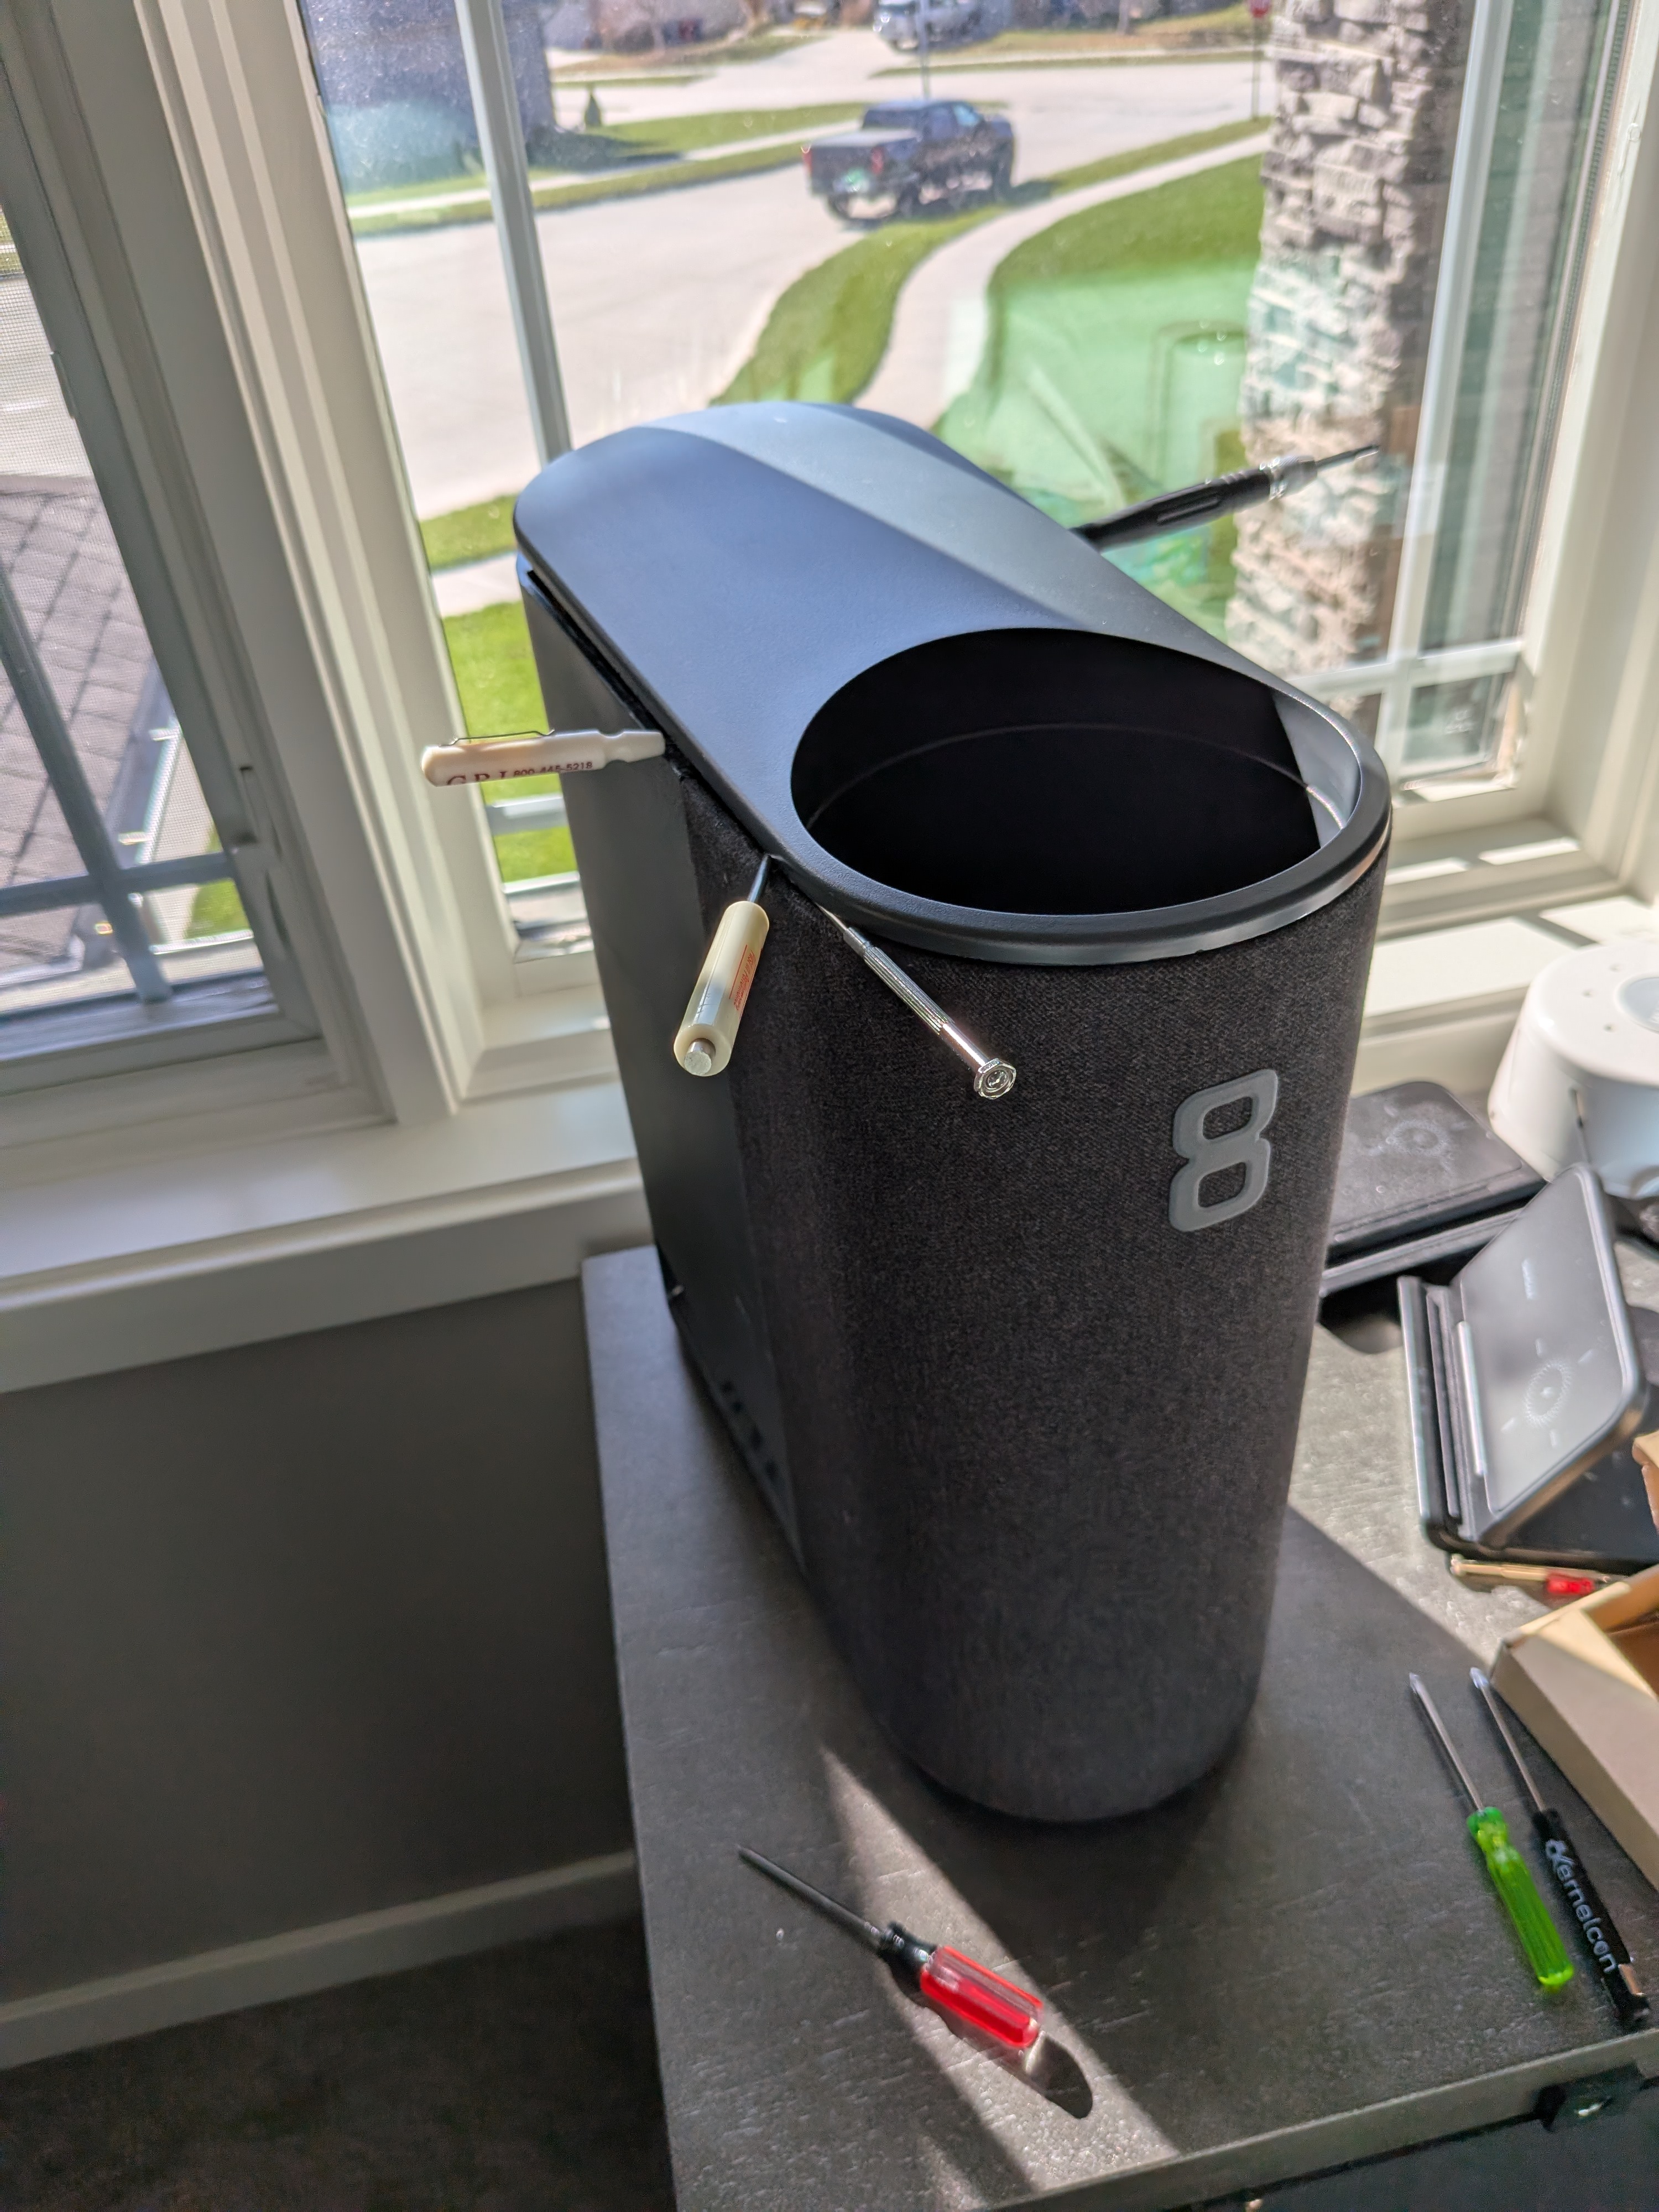
It turns out this was so difficult because of some extra adhesive located by the front grill cover. If you manage to get the spudger in between the adhesive and the plastic it makes it easier. I probably spent 45 minutes on this task alone.
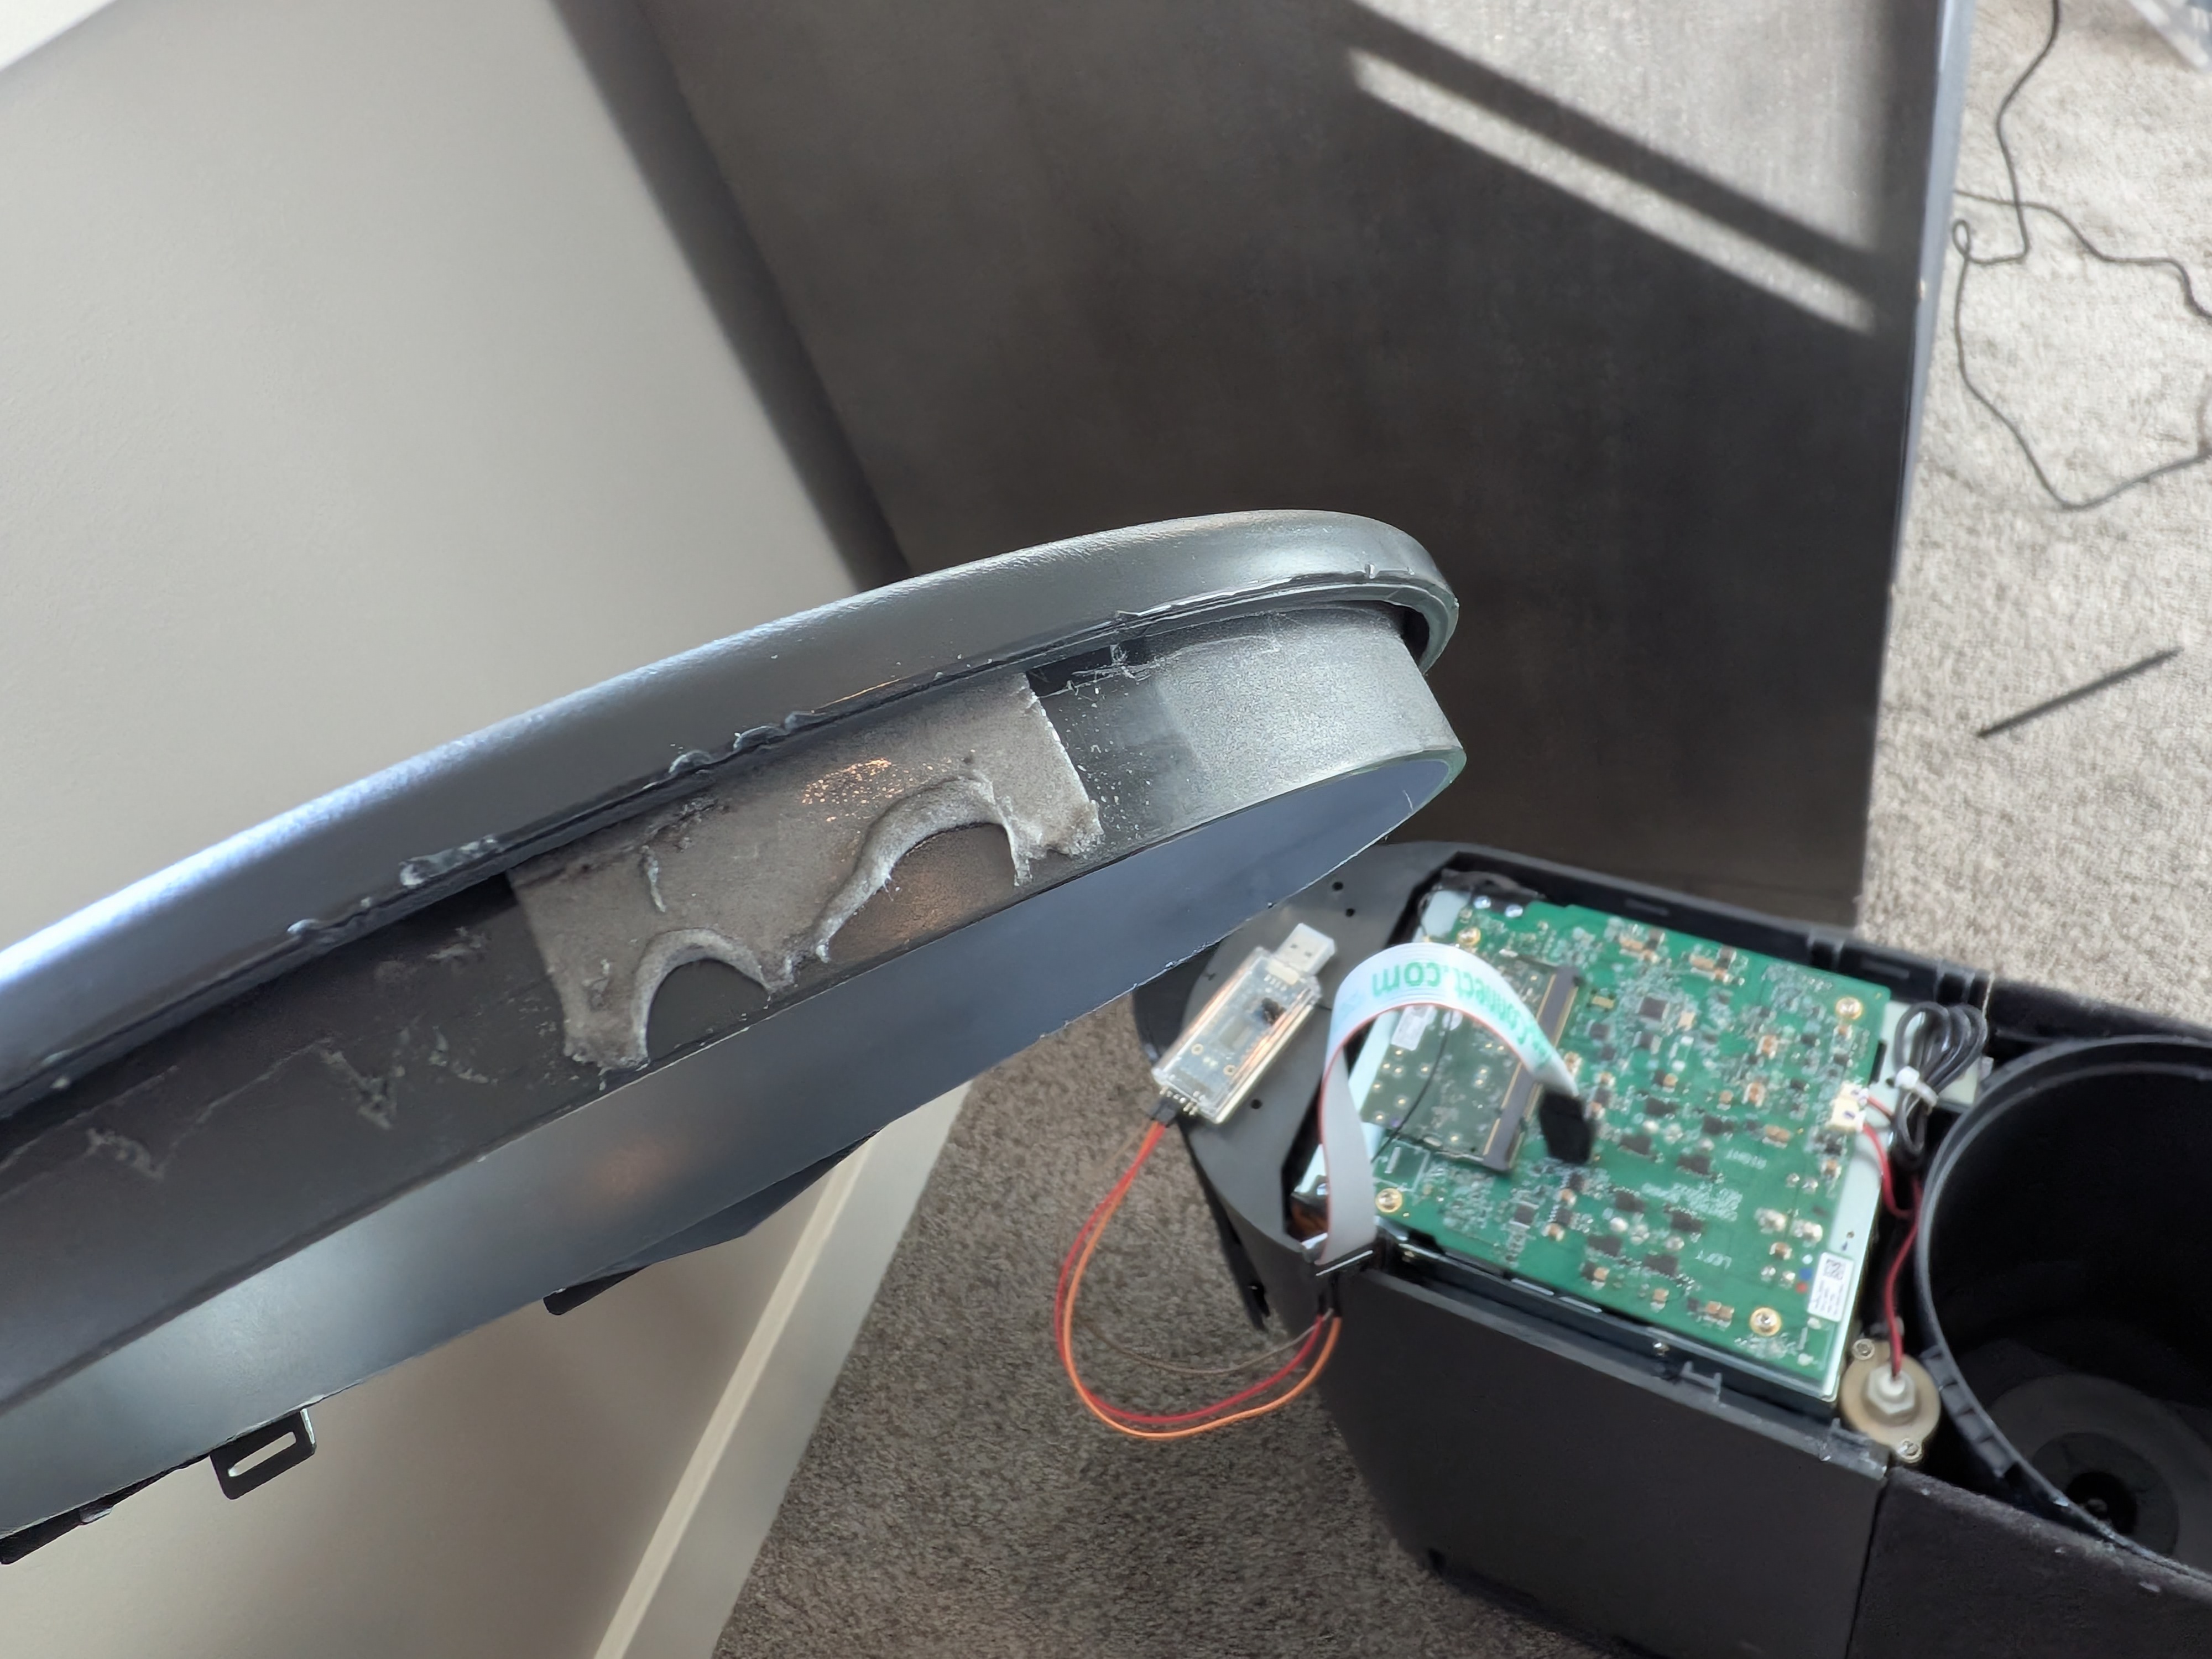
Jailbreak
The process starts with gaining access to the Pod's internal system. The Pod runs a custom Linux distribution, and Free Sleep provides scripts to install a lightweight server directly on the device. This server exposes a REST API that can control all the Pod's functions — temperature, schedules, alarms, and settings — without ever needing to connect to Eight Sleep's cloud infrastructure.
With the Pod opened and the circuit board exposed, it's time to connect to the device. The process starts with connecting your FTDI adapter to the Pod's JTAG header. The detailed connection instructions can be found in the Free Sleep installation guide, but here's the overview:
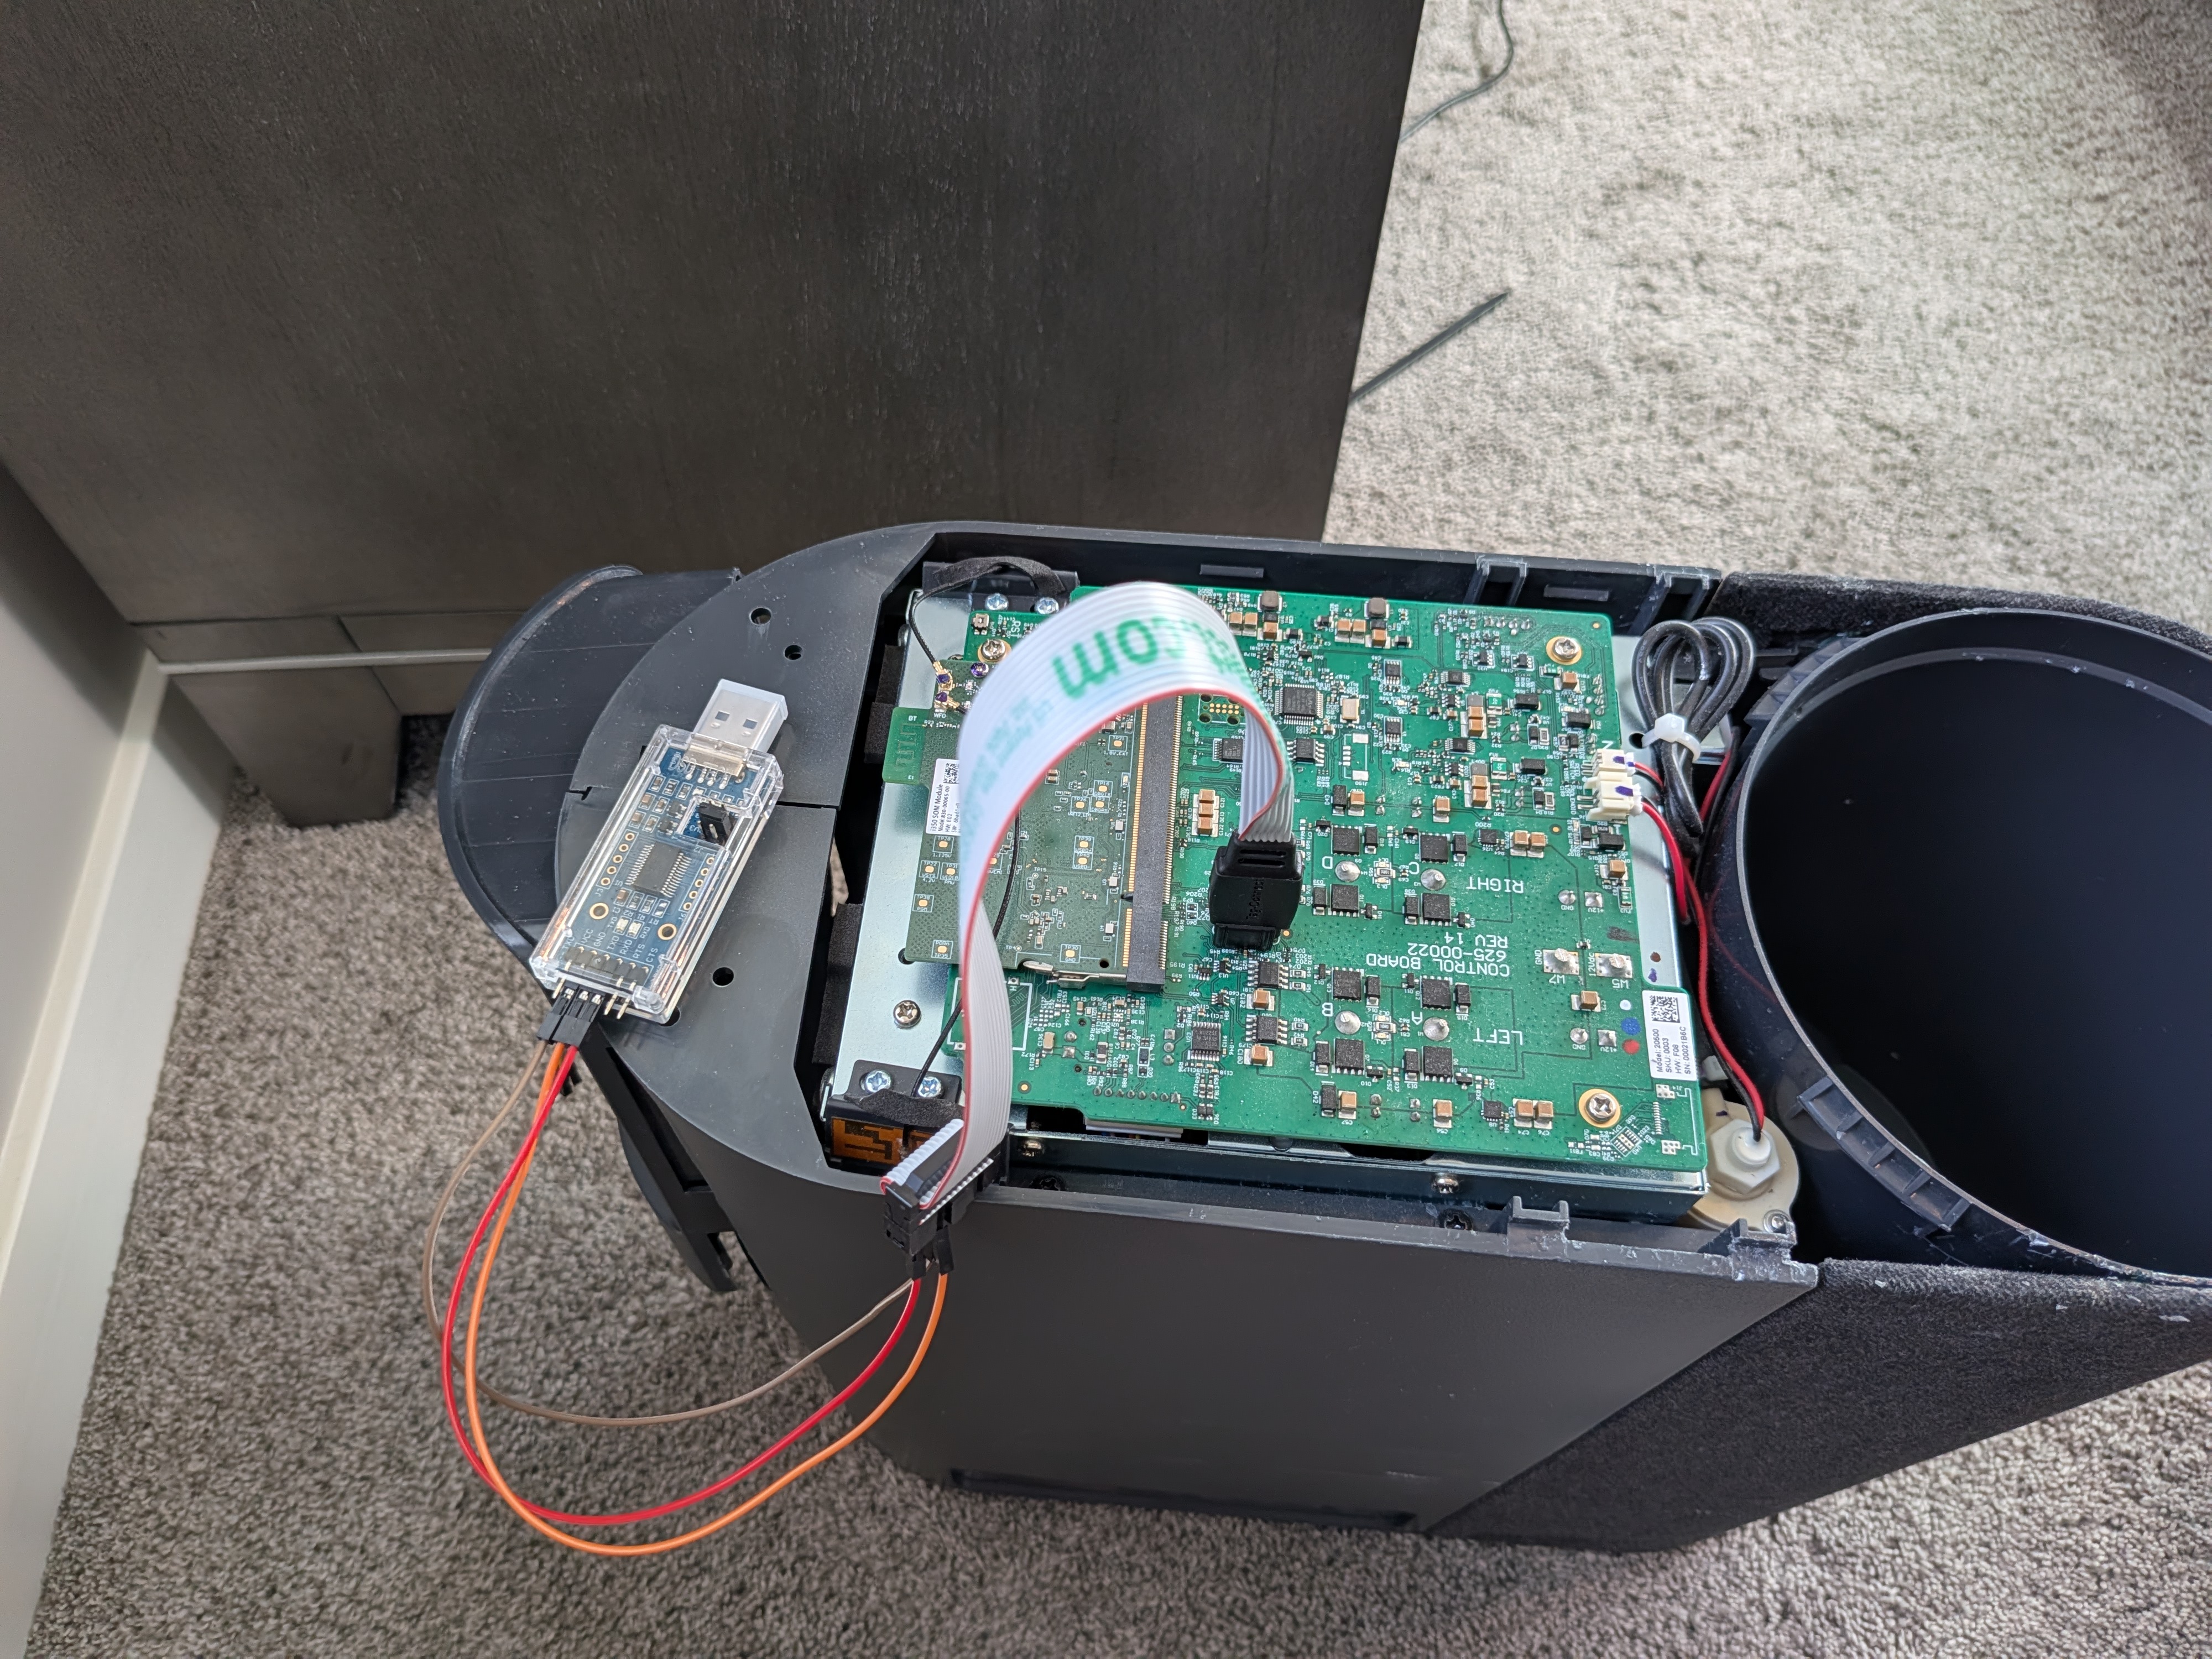
- Your pod should be unplugged at this point. It doesn't need a connection to the mattress cover OR power at this point.
- Using dupont wires, connect your tag-connect cable to your FTDI FT232RL following the wiring diagram in the Free Sleep documentation.
- Connect your tag-connect cable to the circuit board's JTAG header.
- Connect your FTDI FT232RL to your computer.
Once connected, you'll need to set up a serial connection using minicom (or similar) at 921600 baud. The Free Sleep repository provides detailed instructions for this step, but the key is to interrupt the boot process when you see "Hit any key to stop autoboot" - I just hit CTRL + C.
1234567# VERIFY your current_slot = a, if not, go back and firmware reset your pod
printenv current_slot

# If you have current_slot=a
setenv bootargs "root=PARTLABEL=rootfs_a rootwait init=/bin/bash"

run bootcmd
After interrupting the boot, you'll modify the boot environment to gain root access, mount the filesystem, update passwords, and then reboot.
12345678910111213141516171819202122# Mount /proc for process and system information
mount -t proc proc /proc

# Mount /sys for hardware and system-level information
mount -t sysfs sysfs /sys

# Mount /dev for device files (e.g., /dev/mmcblk0)
mount -t devtmpfs devtmpfs /dev

# Mount /run (optional but useful for some runtime scripts)
mount -t tmpfs tmpfs /run

# Mount the file system in read write mode (BE CAREFUL EDITING MODIFYING FILES)
mount -o remount,rw /

# Update the root passwords
passwd root
passwd rewt

# Sync and reboot
sync
reboot -f
Once you're logged in as root, you'll disable software updates to prevent Eight Sleep from shipping new updates to your pod.
12345# Disables the software updates
systemctl disable --now swupdate-progress swupdate defibrillator eight-kernel telegraf vector frankenfirmware dac swupdate.socket

# Blocks the software updates if we ever restart or power off the device
systemctl mask swupdate-progress swupdate defibrillator eight-kernel telegraf vector frankenfirmware dac swupdate.socket
Next, set up WiFi to your local network.
12345678# Replace WIFI_NAME and PASSWORD with your actual WiFi credentials
nmcli connection add type wifi con-name WIFI_NAME ifname wlan0 ssid WIFI_NAME wifi-sec.key-mgmt wpa-psk wifi-sec.psk "PASSWORD" ipv4.method auto ipv6.method auto

# (OPTIONAL) This will take your Pod out of the "waiting to be setup" state, and will allow you to turn off the blue blinking LED.
sed -i 's/uuid=.*/uuid=700a7a76-2105-4f46-b1b4-c9f3c791c440/' /persistent/system-connections/*.nmconnection

# Reload the network manager
nmcli connection reload
Install the Free Sleep node application and enable it to start on boot.
1234/bin/bash -c "$(curl -fsSL https://raw.githubusercontent.com/throwaway31265/free-sleep/main/scripts/install.sh)"

# Get the IP of the node app on your local network.
nmcli -g ip4.address device show wlan0
The real game-changer? You can completely block your Pod's internet access at the router level. The device will continue working perfectly because everything runs locally. No cloud dependency, no data leaving your network, no risk of service outages affecting your sleep.
Another one of the more appealing aspects is that this is completely reversible. If something goes wrong or you want to go back to the official app, you can simply reset the firmware. For Pod 3 (without SD card) and Pod 4 the process is actually impossible to brick as long as you follow the directions carefully. Pod 1 and Pod 2 are not compatible, unfortunately.
Additional Details
Free Sleep consists of two main components:
Server: A Node.js/Express application that runs directly on the Pod. It communicates with the Pod's hardware through custom APIs (notably using dac.sock for device control). The server provides REST endpoints for:
- Device status and control
- Temperature management with real-time updates
- Schedule management (power on/off, temperature adjustments, priming)
- Alarm configuration
- Settings customization (timezone, away mode, LED brightness)
App: A React-based web interface that connects to the local server. It's designed to work on both desktop and mobile, giving you full control from any device on your local network.
Biometrics
Free Sleep also includes experimental biometric tracking. The project has documented and validated heart rate data (tested over 33 sleep periods against Apple Watches), but HRV and breathing rates haven't been validated and may be inaccurate. Heart rate accuracy tends to be slightly less accurate for females, but overall the validation showed:
- RMSE: 2.88 average (1.45 min, 7.63 max)
- Correlation: 80.8% average (27% min, 95% max)
- MAE: 1.83 average (1 min, 5.77 max)
All biometric data is stored locally in a SQLite database at /persistent/free-sleep-data/free-sleep.db, with vitals calculated and inserted every 60 seconds when presence is detected.
Results
After completing the jailbreak, I now have full local control of my Pod. 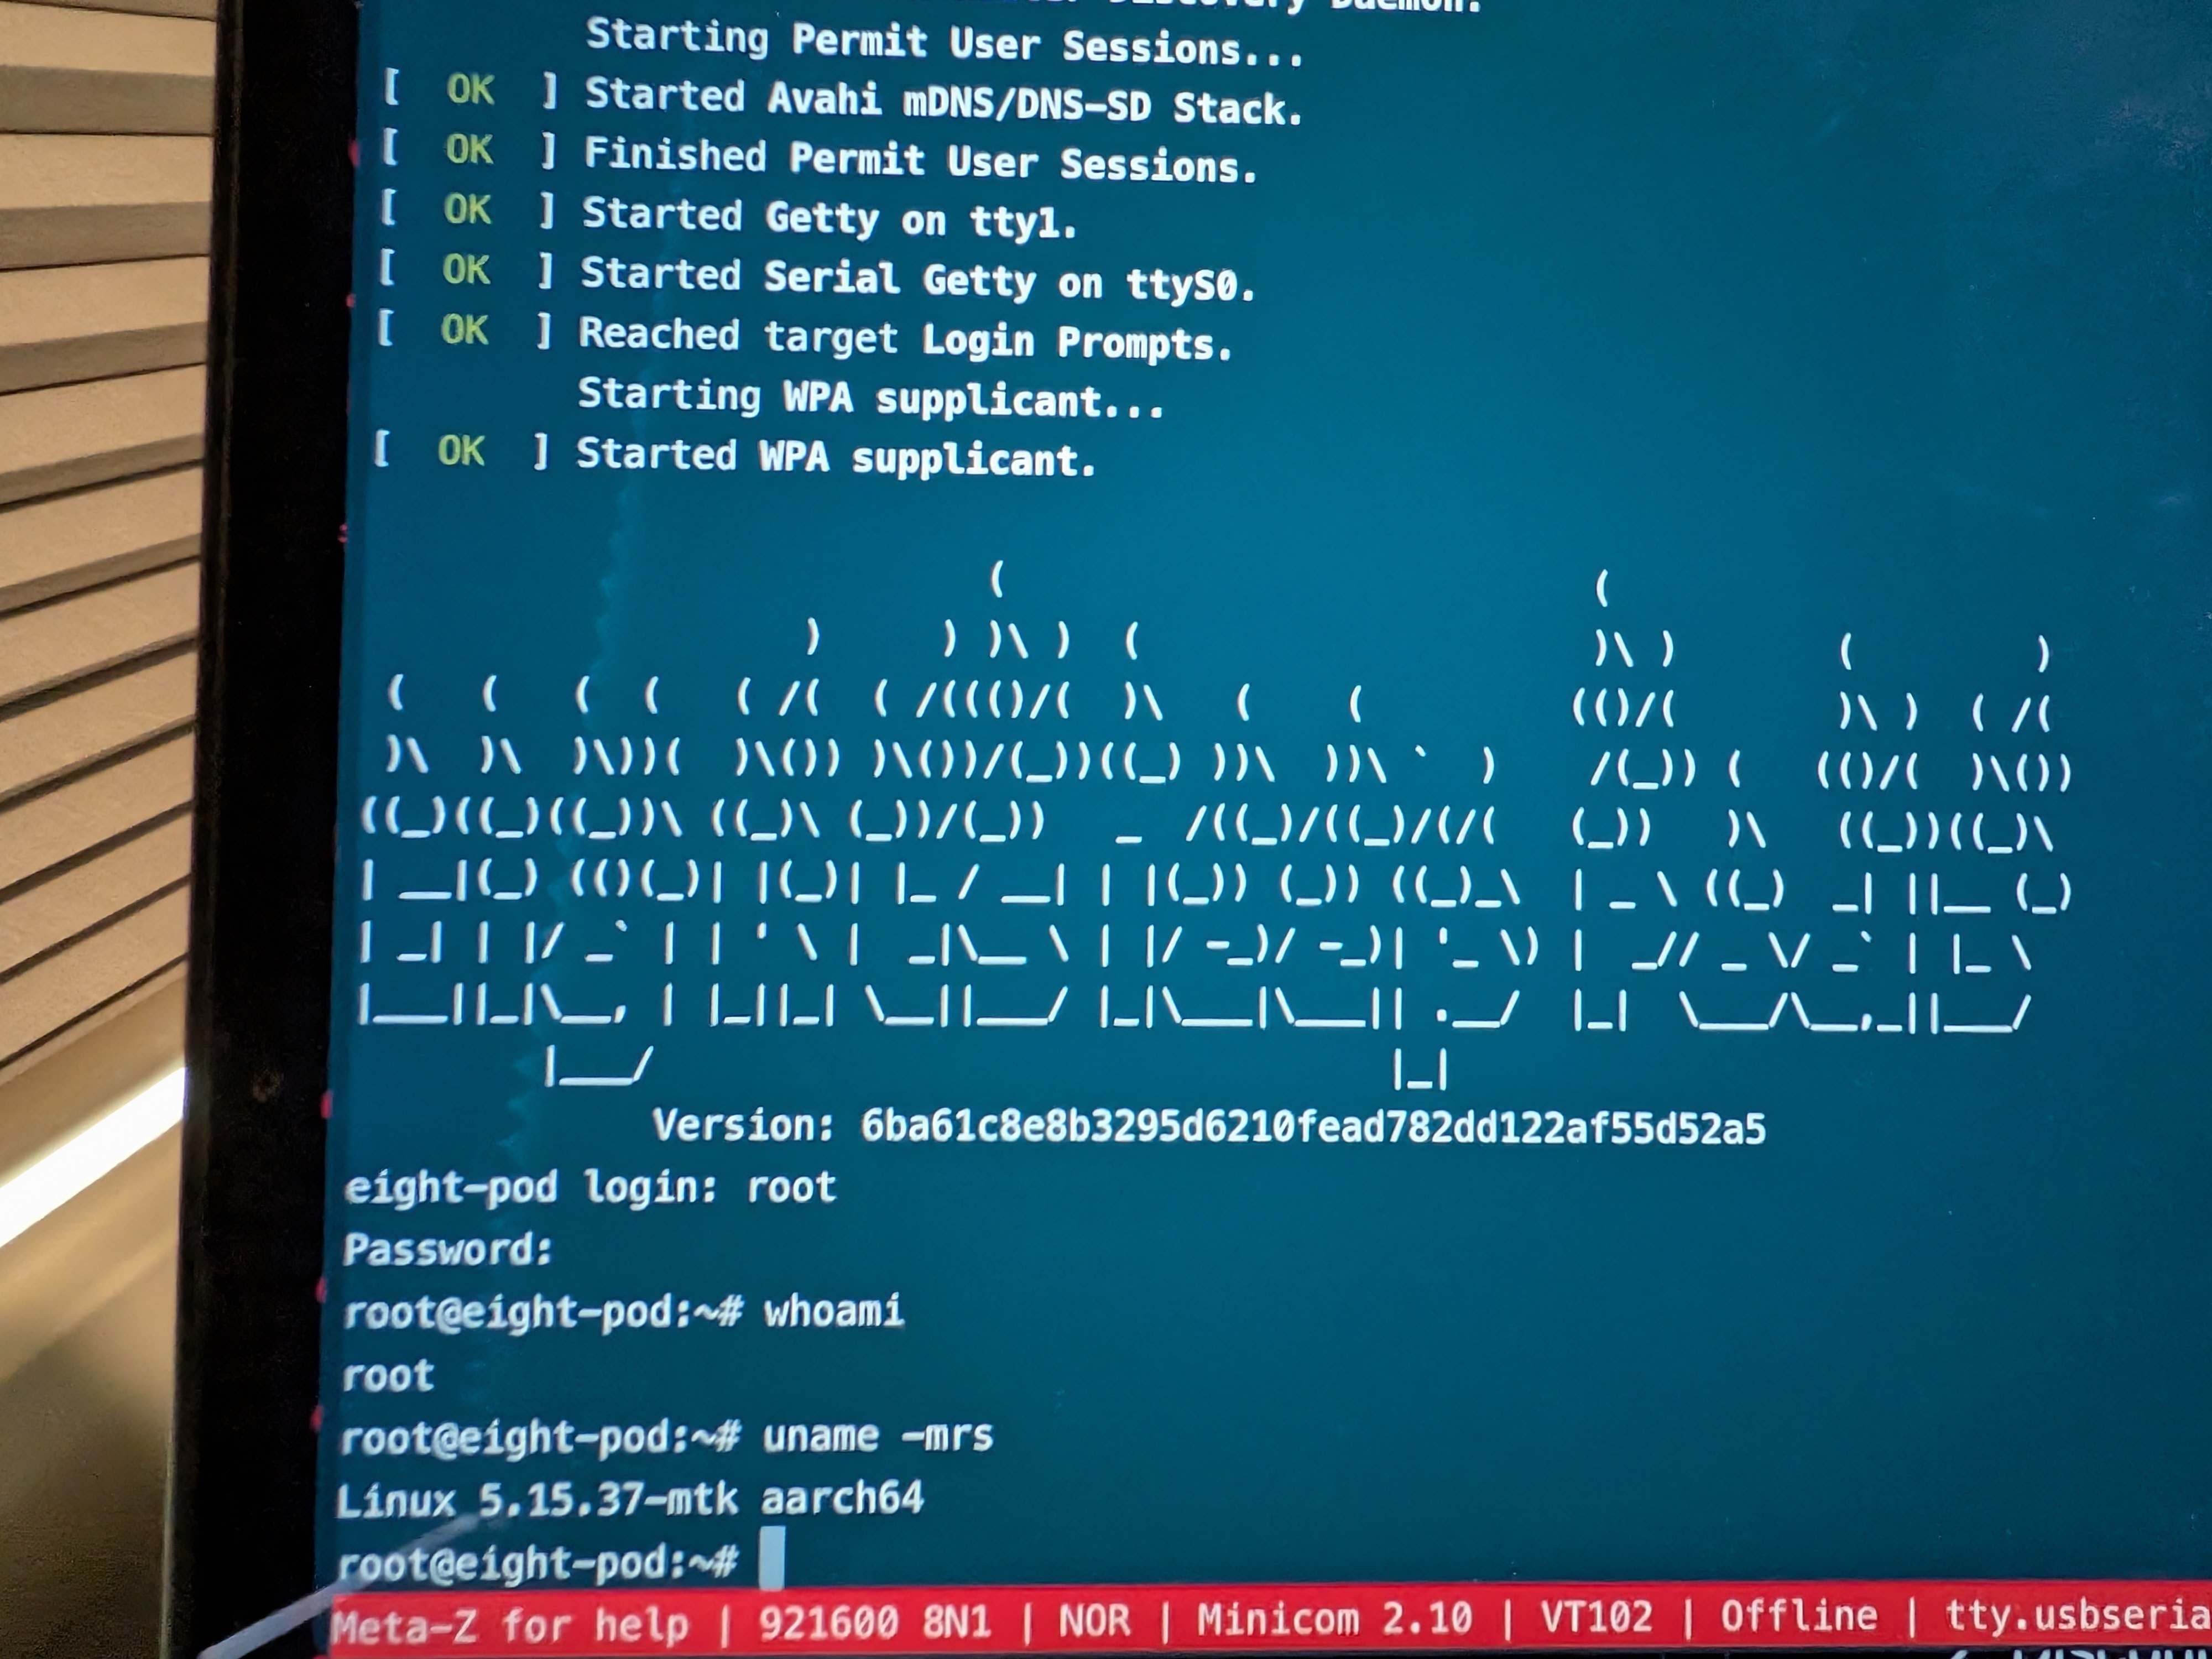 I've blocked all internet access to it on my router, and it works perfectly. The web interface is clean and responsive, and I can control everything from my phone or laptop without any cloud dependency.
The installation process was straightforward, and the project's documentation is solid. The community on Discord is active and helpful, and the project is actively maintained with regular updates. I gave a talk at my local DEF CON 402 group telling others about the Free Sleep project and my experience with it.
See my slides below
TL;DR - Rooted my Eight Sleep Pod using Free Sleep, gaining full local control without cloud dependency. The process is reversible and works on Pod 3. Now my smart mattress cover runs completely offline while maintaining all functionality.